
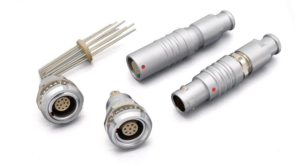
Cleaning and Maintenance of Push-Pull Connectors: Post-Salt-Spray and Post-Sand/Dust Procedures
Cleaning and Maintenance of Push-Pull Connectors: Post-Salt-Spray and Post-Sand/Dust Procedures
Cleaning and Maintenance of Push-Pull Connectors: Post-Salt-Spray and Post-Sand/Dust Procedures
Salt Spray and Sand/Dust
Push-pull connectors are known for quick mating and blind-mate capability, but in salt-spray and sand/dust environments, these advantages do not automatically translate into “maintenance-free.” Chloride ions in salt spray can penetrate platings, causing pitting and crevice corrosion. Hard particles in sand and dust can embed in sealing surfaces and locking mechanisms, accelerating wear during repeated mating.
The damage mechanisms of the two contaminants differ, so the maintenance strategies must also differ: salt spray requires “rinsing + neutralization,” while sand/dust requires “dry removal + inspection for embedding.” The shared bottom line for both is: under no circumstances should contaminants be “pressed” into the connector interior.
Before Cleaning
Prerequisite: Complete De-energization
Before any cleaning operation begins, the connector must be completely isolated from the electrical circuit. For safety-critical equipment, the equipment manufacturer’s maintenance documentation must be strictly followed.
The Boundary: When “Do Not Clean, Replace Instead” Applies
In the following cases, replacement should be evaluated directly rather than continuing to clean:
Deep corrosion or structural damage: Pitting has penetrated the plating, or the shell shows cracks or obvious deformation.
Plating peeling or exposed base material: Peeling or exposed underlying metal on threads, locking surfaces, or mating areas.
Cracked, hardened, or permanently deformed seals: O-rings or gaskets that have lost elasticity and cannot be restored by cleaning.
Maintenance After Salt Spray
Why “Immediate Rinsing” Is Critical
The danger of salt spray is not “wetness,” but salt crystals precipitating and adhering to metal surfaces after drying. Once salt crystals form, corrosion has already begun; subsequent cleaning can only slow it down, not reverse it. Therefore, the first principle after salt spray exposure is: rinse the salt away with fresh water before salt crystals form.
Standard Steps for Salt Spray Cleaning
Step 1: Fresh Water Rinse
Use clean fresh water (potable quality) to thoroughly rinse the connector’s mating surfaces, threads, and O-ring grooves. Lukewarm water is preferable; it should not be too hot or too cold. Rinse for at least 2–3 minutes, focusing on letting the water carry salt away — not forcing water into seals with high pressure.
High-pressure spray guns are prohibited. High-pressure water can force salt water and particles into sealing interfaces, causing worse consequences than not cleaning at all.
Step 2: Mild Detergent Soak (When Visible Salt Deposits or Oil Contamination Are Present)
If visible salt deposits or oily contaminants remain after rinsing, prepare a solution of mild neutral detergent (such as gentle dish soap) in fresh water and soak the connector for 15–20 minutes. After soaking, gently scrub external surfaces and threaded areas with a soft nylon brush (non-metallic) , then rinse thoroughly with fresh water to remove all detergent residue.
Step 3: Drying
Wipe off surface moisture with a lint-free cloth, then use oil-free, moisture-free compressed air to blow dry crevices, threads, and contact areas. Compressed air is the most effective way to dry push-pull connectors because it can reach internal areas that wiping cannot. Finally, air-dry in a clean environment for at least 30 minutes to ensure the connector is completely dry before reassembly or re-energization.
Step 4: Seal Lubrication
After drying, apply a thin film of silicone grease to the O-rings. Silicone grease restores lubricity to the seals, reduces friction during the next mating cycle, and forms a moisture-repellent barrier between sealing surfaces.
Maintenance After Sand/Dust
The Essential Difference Between Sand/Dust and Salt Spray
The damage mechanism of sand/dust is physical: hard particles embed in sealing surfaces, threads, and locking mechanisms, acting as “abrasives” during mating and accelerating wear. Sand/dust itself does not necessarily cause corrosion, but it damages platings, scratches sealing surfaces, and jams locking sleeves. Therefore, the core principle for sand/dust cleaning is: remove dry first, then inspect for embedding, and absolutely avoid using liquids to “flush” particles deeper into the connector.
Standard Steps for Sand/Dust Cleaning
Step 1: Compressed Air Blow-Off
Use dry, oil-free compressed air to blow from both the mating face and the rear of the connector, focusing on threads, locking sleeve crevices, and O-ring grooves. Air pressure should be kept low (reference value ≤0.4 MPa), with the nozzle held at a distance to avoid high-speed airflow forcing particles into seals.
Step 2: Soft Brush Assistance
For adherent dust that compressed air cannot remove, gently brush with an anti-static soft brush or non-abrasive nylon brush. Metal sharp objects, needles, or blades are prohibited — these tools will scratch platings and sealing surfaces, causing damage far greater than the dust itself.
Step 3: Inspect for Embedded Particles
After blowing and brushing, carefully inspect thread roots, O-ring surfaces, and locking elements of the locking sleeve for embedded hard particles. Embedded particles cannot be removed by blowing; if they have already affected sealing or locking function, they must be handled according to the maintenance manual — not forced back into service.
Step 4: Use Isopropyl Alcohol When Necessary
If sand/dust is accompanied by oil or grease contamination, wipe contacts and shell surfaces with 99% purity isopropyl alcohol on a lint-free cloth. Isopropyl alcohol evaporates quickly and leaves no moisture inside the connector. Acetone, toluene, strong alkaline cleaners, and abrasive cleaners are prohibited — these solvents can damage platings, insulators, and seals.
Step 5: Drying and Inspection
Even if only a small amount of isopropyl alcohol was used, blow dry with compressed air and confirm no residue remains before reassembly. After cleaning, re-inspect whether seals have been scratched by particles and whether the locking sleeve operates smoothly.
Post-Cleaning Inspection
Cleaning itself “reveals” damage that was previously hidden by dirt. Post-cleaning inspection is as important as the cleaning itself.
Inspection Checklist:
Shell: Any previously undetected pitting, cracks, or deformation?
Plating: Any peeling, discoloration, or exposed base material on threads, locking surfaces, or mating areas?
Threads: Clean, free of metal debris, properly aligned? Does coupling engage smoothly?
O-rings and seals: Any cracking, hardening, or permanent deformation?
Locking sleeve: Is push-pull action smooth and free of jamming? Is locking feedback clear?
Contacts: Any discoloration, corrosion, or plating wear?
Blind-Mate Efficiency Comes from Design
our product line covers all of them, and all are available with RoHS-compliant plating options (Electroless Nickel / Black Zinc Nickel)
Receive selection advice + compliance document templates within 24 hours
Recent Posta
Cleaning and Maintenance of Push-Pull Connectors: Post-Salt-Spray and Post-Sand/Dust Procedures

Field Maintenance of M83513: How to Quickly Replace Contacts? Our

38999 vs MIL-C-83513: Circular vs Micro-Rectangular Our Products Two Shapes,
Get Quote of Connectors